¶ Campaigns
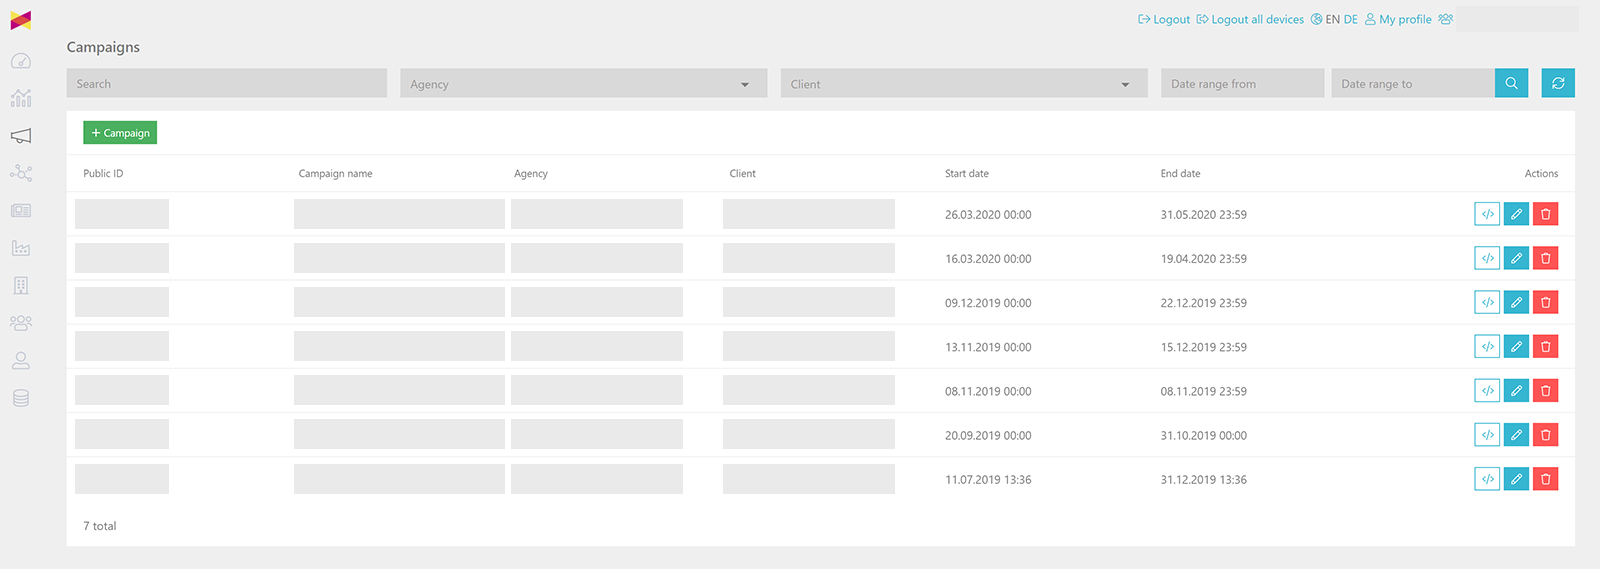
In the campaigns section you can set up an manage your campaigns. You can connect agencies, advertisers and publishers to a campaign and generate trackinglinks for your campaign. If you prefer to work with Google UTMs or Adobe CIDs, you dont have to set up a campaign in fusedeck.
¶ Add campaign

Click the "Campaigns" button in the navigation on the left hand side.

On the campaigns overview page, click the "+ Campaign" button.
¶ Create Campaign
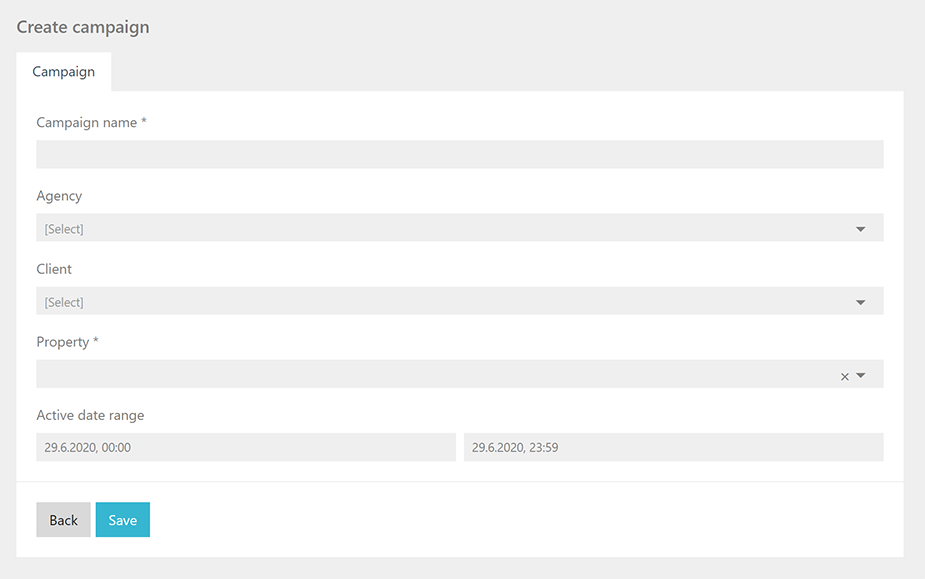
Fill in the campaign name, select the agency working for this campaign from the dropdown, the client and the property where this campaign should be connected to. Then select the start and end date of the campaign. This time period can be used in reports later on. Click the save button to store the information.
¶ Add landing page

Click the landingpage tab on top and click the "+ Landing page" button afterwards. Add the landing page name and the URL to the right, then click the "Save" button. The URL can contain tracking parameters from third party tools such as Google UTMs or Adobe CIDs. You can add as many landing pages as you want.
¶ Create ad group

Click the Ad groups tab on top, then click the "Add ad group" button to open the menu on the right. Give your ad group a meaningful name as you can use it later on in reports. E.g. the content of the creative such as "Blue car". You can add as many ad groups to structure your creatives as you want.
¶ Create ads

Now you can start to add creatives to your campaign. Click the "+" icon in the list on the left in the "Blue car" ad group.
Fill in the ad details on the right side. Choose an ad name (e.g. 160x600_bluecar_de).
Select the landingpage type from the drop down menu. You can choose "Custom URL" which is used if you have to add a redirect URL from a third party ad server. This will then be used instead of the landingpage URL. Or you "Landing page" from the dropdown and select one of the landingpage you have defined from the drop down menu.
You can add tags to your ad to describe the creatives (e.g. blue, car, suv, summer). This can be used in reports later on.
Finally, select the ad language from the dropdown menu. This information will also be available in reports.
You can add as many adds as you want.
¶ Connect publishers to campaign

Click the publishers tab on top, then click the "+ Publisher" icon to connect a publisher to this campaign.
Select the publisher from the dropdown menu to the right. A new dropdown with the sites assigned to this publisher will appear. Select the site from this publisher that should be connected to the campaign.
Then choose the ad groups the publisher should be connected to. The publisher will automatically be connected to all ads specified in that ad group.
Click the "Save" button to connect the publisher to the campaign.
¶ Get ad code
Once you have connected at least one publisher to a campaign, you can now get the ad code to track the traffic from that publisher.
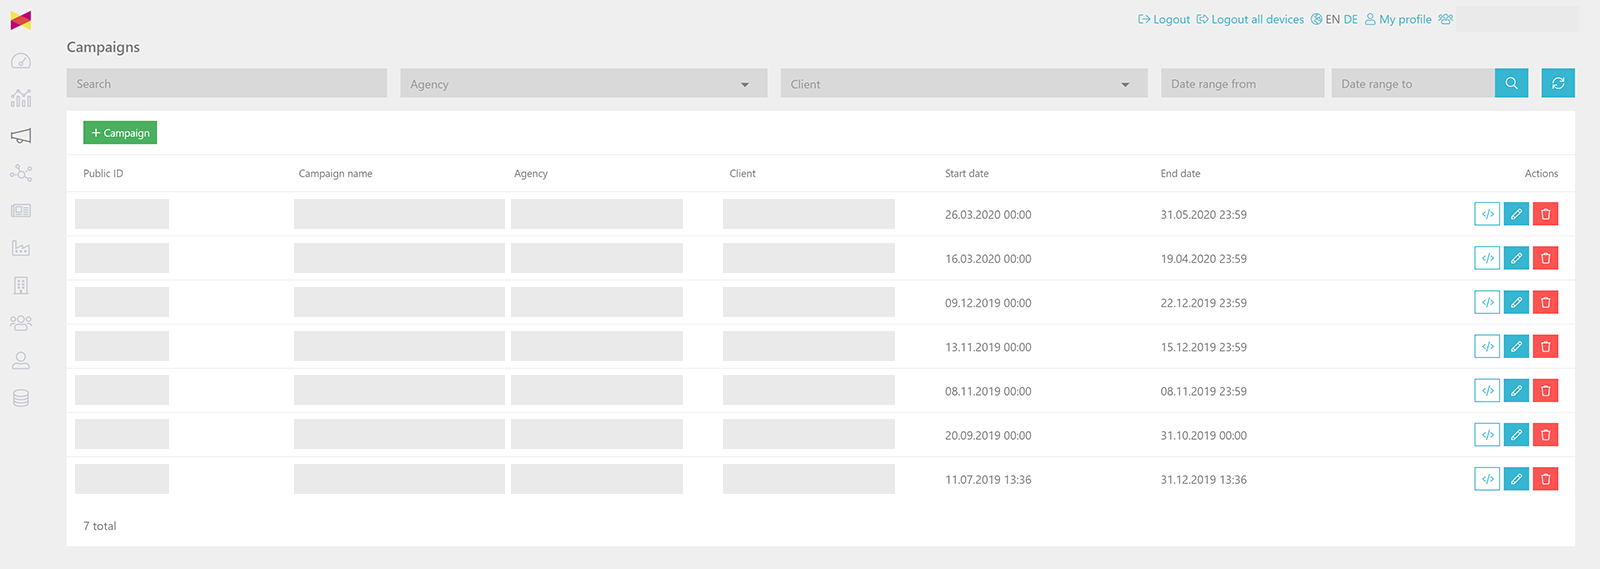
Go back to the campaign overview page and click the code button to the right (</>).

You will get a list of all publisher with their websites, that you have connected to the campaign. Click the "Eye" button on the right side to get access to the ad tracking links.
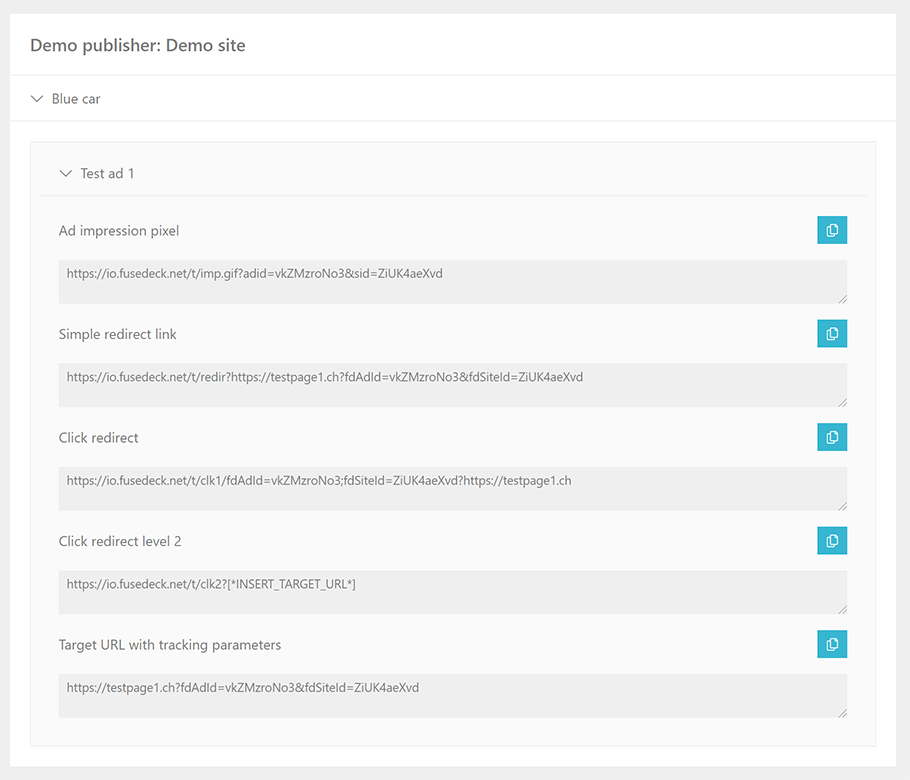
You can now see all trackinglinks for all ads of the publisher website you have selected.
¶ Add code types
fusedeck supports different trackinglinks for different purposes:
- Ad impression pixel - use the pixel in an ad to track the ad impressions. Please note, that tracking ad impressions will cause the number of saved database rows will increase, even though ad impressions are aggregated.
- Simple redirect link - this trackinglink can be used if you want to cloak the referrer information.
- Target URL with tracking parameters - this is be basic trackinglink that can be used for all campaigns if no ad server redirect is used in between. Crawlers can follow this link and referrer data is reported.
- Click redirect and click redirect level 2 - this type of redirect can only be used if a third party tracking redirect (e.g. from an ad server) is involved.
Click redirect (level 1)
A click redirect will look like this:
https://io.fusedeck.net/t/clk1/fdAdId=someID;fdSiteId=someID
Now you add the redirect from the ad server to the trackinglink:
https://io.fusedeck.net/t/clk1/fdAdId=someID;fdSiteId=someID?https://adserverredirectlink.com
Click redirect (level 2)
The ad server usually points to the landingpage with some tracking parameters:
https://www.landingpage.com/?utm_source=display&utm_medium=banner-blue-car&utm_campaign=car-campaign
Instead of linking directly from the ad server to the landingpage, the ad server should link back to fusedeck with the landingpage included:
https://io.fusedeck.net/t/clk2?https://www.landingpage.com/?utm_source=display&utm_medium=banner-blue-car&utm_campaign=car-campaign
The click redirect 2 will then get the parameters from the fusedeck ad position and will add it automatically to the landingpage URL.
¶ Edit campaign
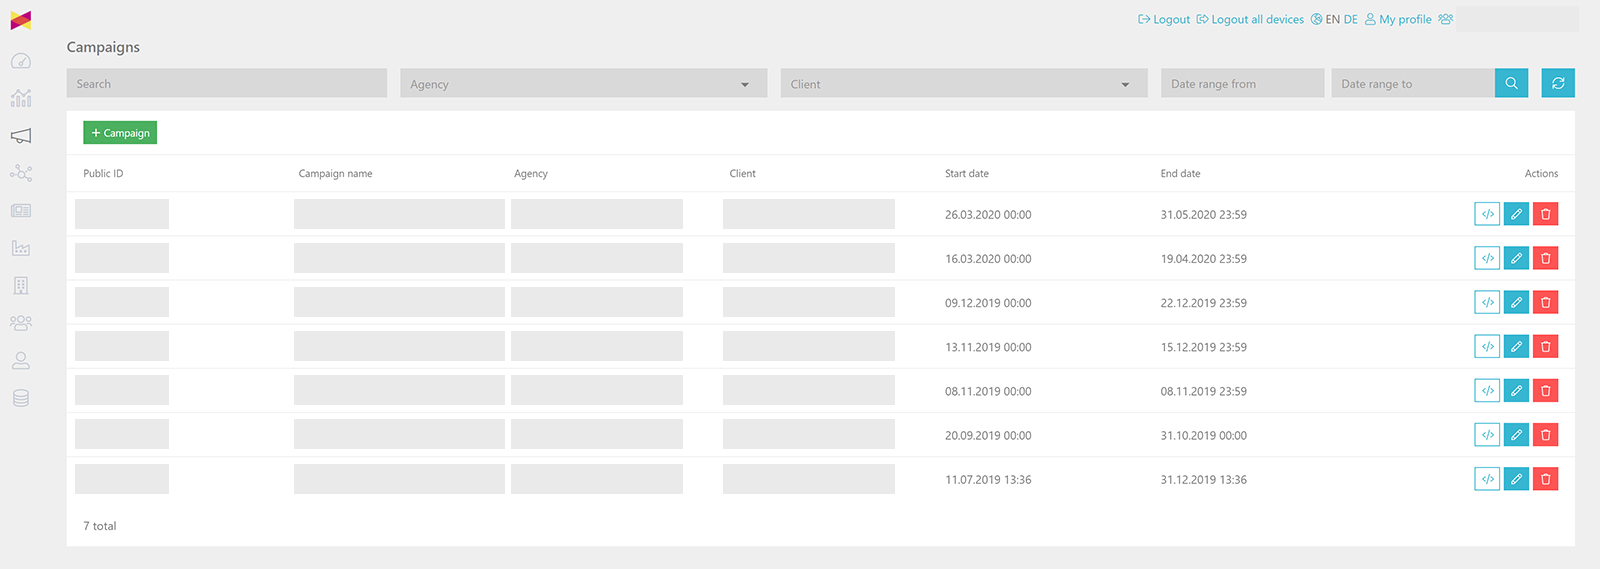
Select the campaign you want to edit on the campaign overview page by clicking the "Edit" button on the right hand side. Store your changes by clicking the "Save" button at the bottom of the campaign details page.
❗ Changing the campaign name, ad name, ad group name etc. will have an effect on all data that has been stored. The names will also change for the time past.